Have you ever wondered how people create transparent images that match any background they’re placed on? In most cases all that is required to create one is to remove the original background from your image and leave it blank (i.e. transparent), then save it in a format that supports transparent backgrounds such as GIF or PNG.

The tricky part of doing that however is that removing the background from photos can be fairly complicated. It can be difficult to select the background precisely, and imperfections may remain after you remove it. If you want an easy photo background changer that isn’t going to be too complicated to use, your best bet is to give Movavi Photo Editor a whirl.
To remove the background from any photo or image, the first thing you need to do is open it in Movavi Photo Editor. Just click on the ‘Browse for Images’ button and select the image that you want to edit, or drag and drop it into the main window to add it to the editor.
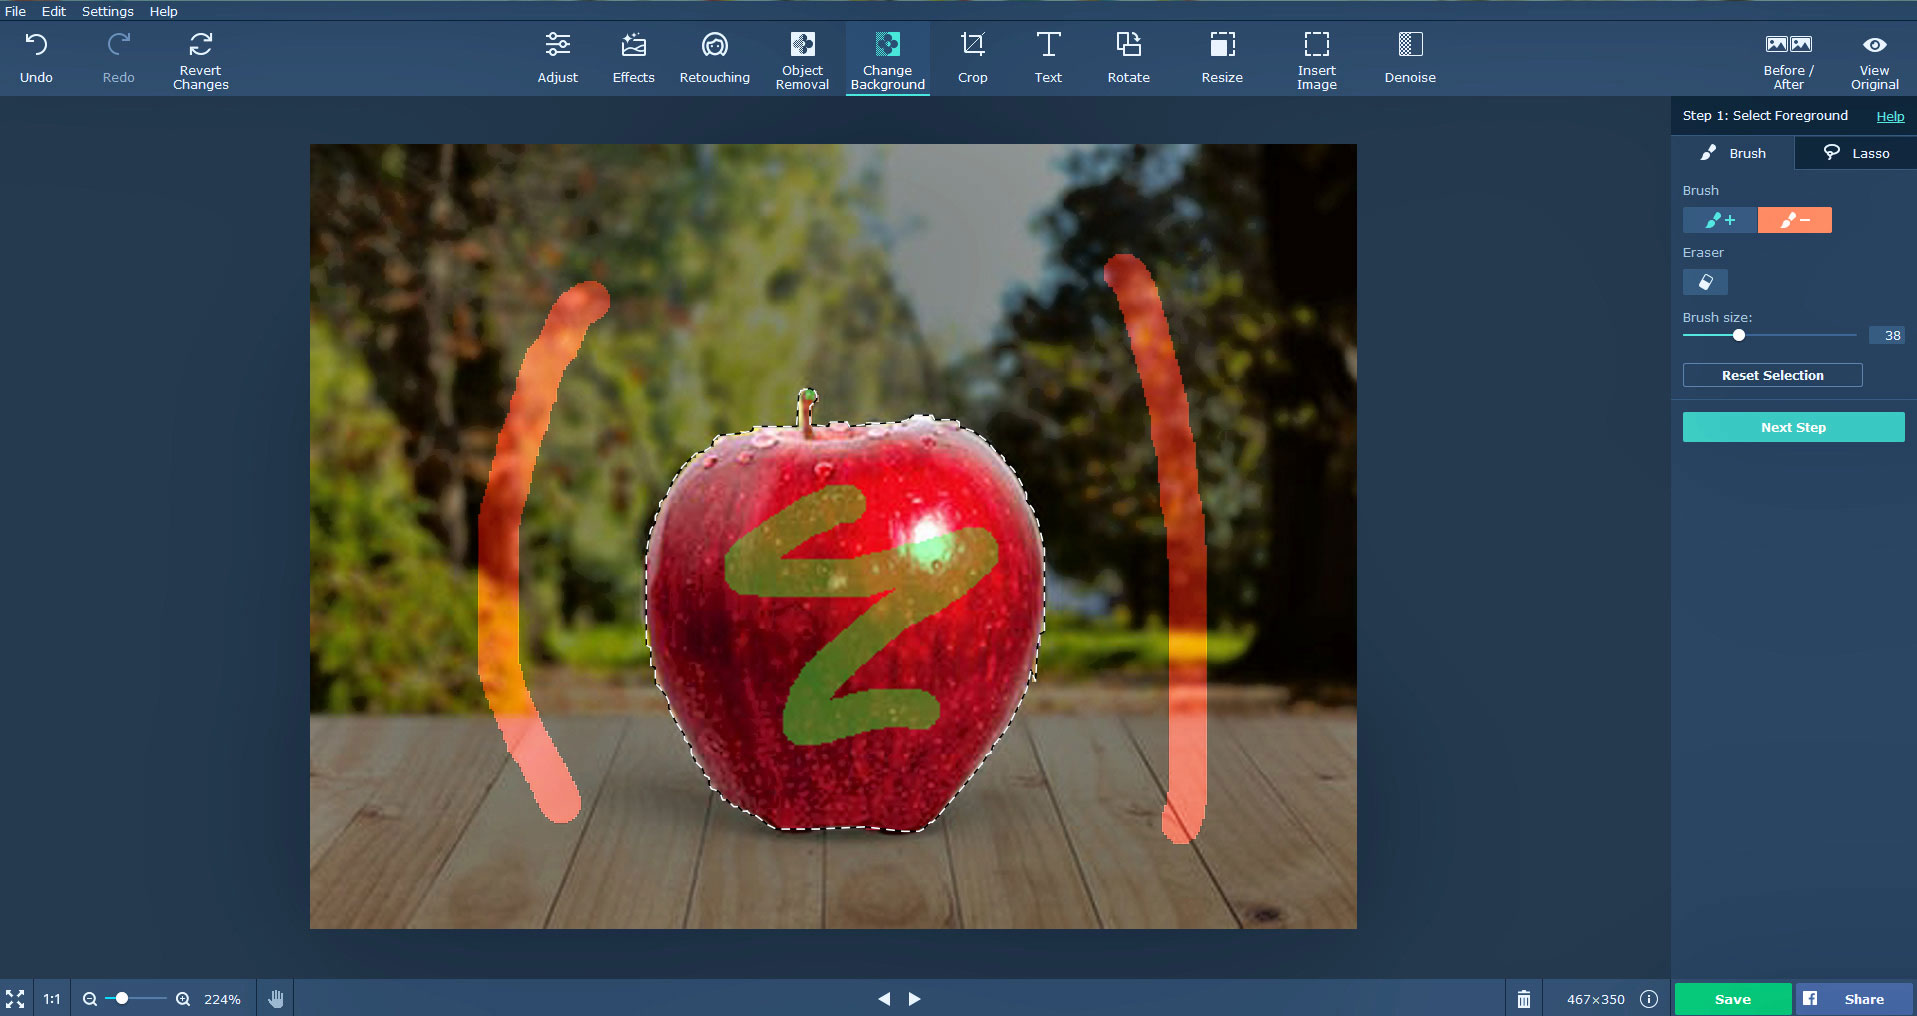
Next you should open the ‘Background Removal’ tab by clicking on it in the upper panel of Movavi Photo Editor. In the sidebar that opens you’ll see a green-colored ‘Foreground Brush’ and a red-colored ‘Background Brush’ that you can select and use to paint over the foreground and background respectively.

As you select elements by painting over them, a yellow outline will appear that denotes the elements that you’ve selected. Assuming you’re satisfied you can click on the ‘Set New Background’ button and Movavi Photo Editor will remove the background when you do. At this point the background will be transparent, and you can click ‘Apply’ then ‘Save’ and select PNG or JPG.
On the other hand if you want to replace the background with a different image, click on the ‘Add Image’ button and select the image that you want to use. If you aren’t happy you can discard the changes by clicking ‘Reset’ or finalize them by clicking ‘Apply’ then proceed to save your photo.
Rather than saving the photo immediately however, you may want to try editing it in other ways to improve it. With the features in Movavi Photo Editor you could remove unwanted elements, apply filters, add captions, touch up portraits, transform the frame and orientation, and fix most issues with just a few clicks.
All said and done it is up to you to determine exactly how you want your photo to look, and then edit it accordingly. By using Movavi Photo Editor you should have no problem tweaking and altering it in any way necessary – but you may want to experiment a little to get a feel for its features.