Metallic effect adds a royal looks in the creative art, hence it is the imperative thing to learn how to give metallic effects to the fonts or texts using Photoshop. Let’s see the scratch tutorial of giving metallic effects to the fonts using Photoshop.
Advice: I suggest using latest version of Photoshop because it gives an advantage over clarity and better texture rendering. Here in the tutorial I am using Adobe Photoshop CS 5 version.
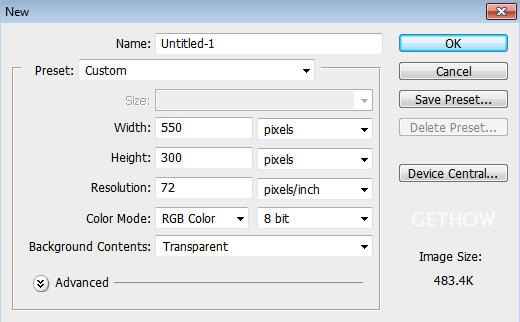
Step 1 : Create a New Clipboard
Step 2 : Create a Project
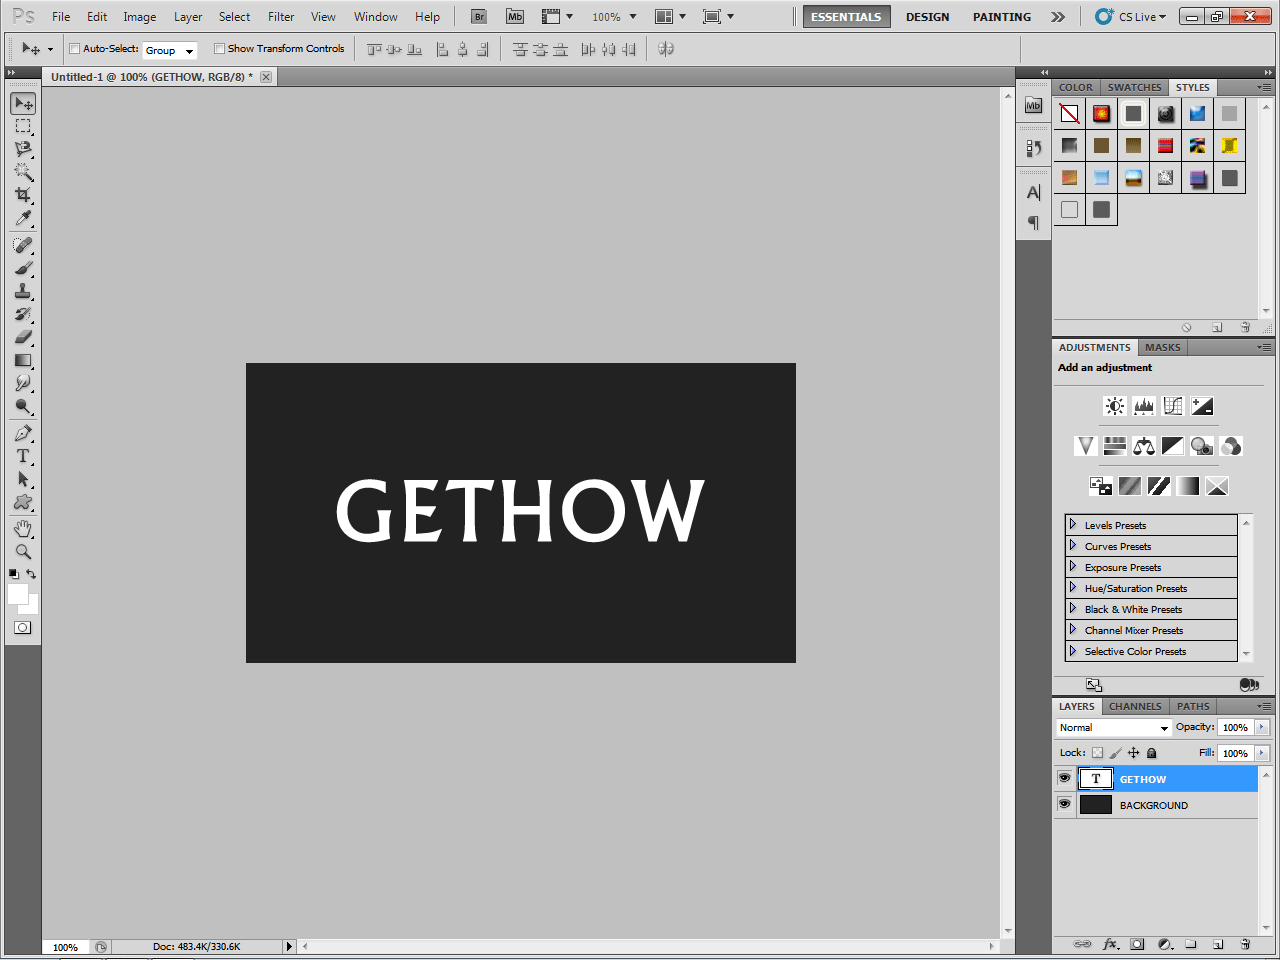
Create First layer as a Background Color
It is better if you use dark background every time. This will be good for getting master effect every time. On light colors it can be done but the metallic effect won’t create an eye catchy effect.
Create Second Layer for Texts or Words
After deciding the dark color you can write texts or words as per you to which you want to give a metallic effect. Here I am making GetHow as a metallic text on dark-colored background.
Tip: To create a New Layer always uses Ctrl + Shift + N its better and faster way to get one.
Step 3 : Select Layer Which Has Text
Here the second layer I have created is text layer, it always on you how you manages the layers.
Step 4 : Add Some Blending Options
In the layer box there is a small icon of fx button that button is used for blending options.
There are 4 effects we have to add, those are as follows.
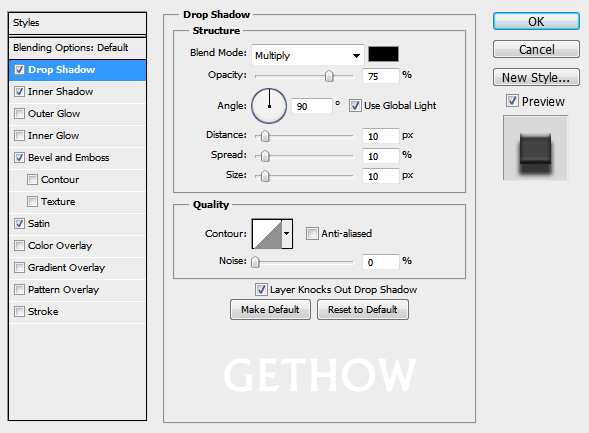
1. Drop Shadow
Under drop shadow we can set the specific angle of dropping the shadow. Here I had set the shadow angle to 90 Degree top which means light is coming from top and leaving shadow opposite to it. If you are confused with setting up the angles check the Use Global Light which is all in one solution to every one.
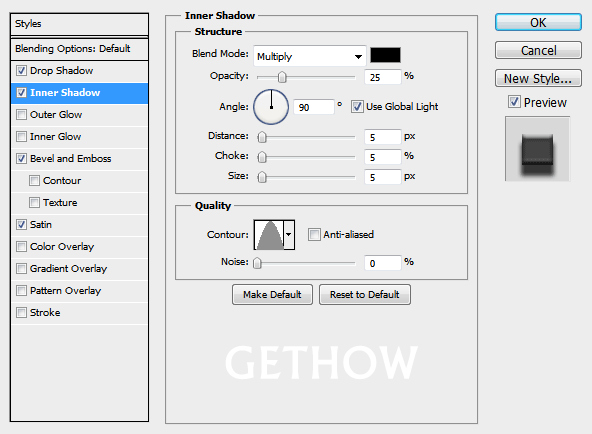
2. Inner Shadow
The same show option is here. In addition we have to set the blend mode to multiply which will increase the depth of inner shadow.
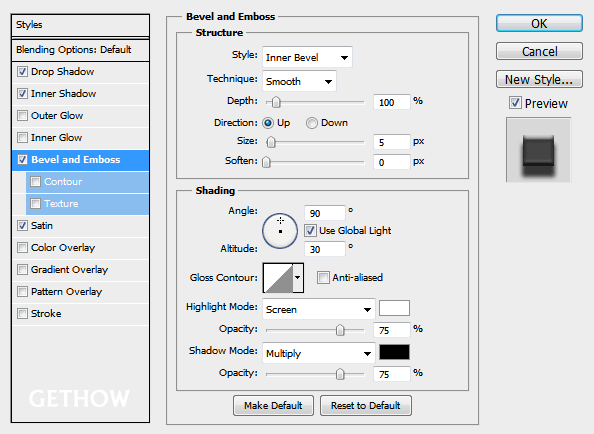
3. Bevel and Emboss
The all settings can be let as set to be default value.
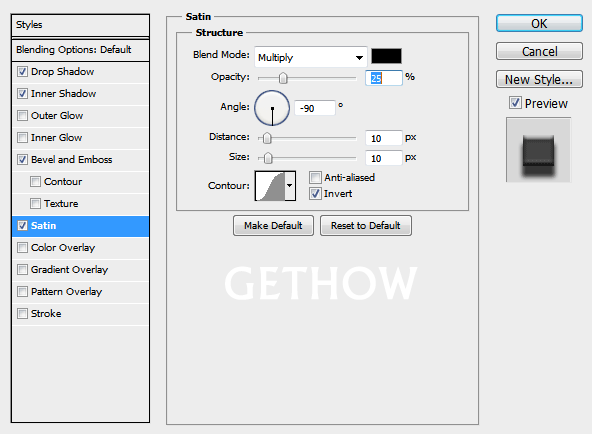
4. Satin
In satin option we can set the cleanliness in the all over the layered effects. It is good to use check this option always to free up the contrast and clarity problems.
According to above all image we have to set the blending options either manually or can be left as default value, both the option will does the same job. We can set and modify the values of every blending option according to the need of requirement like changing shadow rate, angle, depth and all.
Step 5 : Save all Blending Options
Finally after setting up all the values we have save them all by clicking on OK Button.
Step 6 : Save the Image File
After saving the blending option the text would appear as a solid metal format. That all the ways we can make a simple text looks like a metallic written text format.
These are steps to give a metallic effect on texts using Photoshop.

